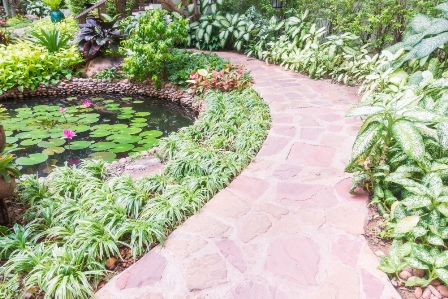
Garden edging not only enhances the aesthetic appeal of your garden but also serves practical purposes such as preventing soil erosion and keeping mulch and plants within designated areas. Edging your garden with bricks is a popular choice due to the durability, classic appearance, and low maintenance of bricks. In this guide, we will walk you through the step-by-step process of creating a beautiful brick border for your garden.
Benefits of Brick Edging
Before diving into the installation process, let’s explore the key benefits of using bricks for garden edging:
- Durability: Bricks are long-lasting and can withstand various weather conditions.
- Aesthetic Appeal: Bricks provide a timeless, clean look that can complement any garden style.
- Low Maintenance: Once installed, brick edging requires minimal upkeep.
- Versatility: Bricks can be arranged in various patterns to create unique designs.
Materials and Tools Needed
To edge your garden with bricks, gather the following materials and tools:
- Bricks: Choose from traditional red bricks, concrete bricks, or any style that matches your garden’s aesthetic.
- Edging shovel or spade: For digging a trench.
- Garden hose or string: To outline the edging path.
- Level: Ensures bricks are even and stable.
- Rubber mallet: Helps to gently tap bricks into place.
- Gravel or sand: For creating a stable base.
- Landscape fabric: Prevents weeds from growing between the bricks.
- Concrete or mortar (optional): For a more permanent installation.
Step-by-Step Guide to Installing Brick Edging
1. Plan the Edging Path
Start by planning the path where you want to install the brick edging. Use a garden hose or string to outline the desired shape. This helps you visualize the final look and make adjustments before digging.
2. Prepare the Trench
Using an edging shovel or spade, dig a trench along the outlined path. The trench should be about 6 inches deep and wide enough to accommodate the width of the bricks plus some extra space for the base material. Make sure the trench is even and free of large roots or rocks.
3. Lay the Base
Fill the trench with a 2-3 inch layer of gravel or sand. This base layer provides stability and helps with drainage. Use a level to ensure the base is even. If you’re using landscape fabric to prevent weeds, lay it over the gravel or sand.
4. Position the Bricks
Start placing the bricks in the trench, one by one. Ensure each brick is snug against the next to create a continuous edge. Use a level to check that the bricks are even. If needed, tap the bricks gently with a rubber mallet to adjust their position.
5. Secure the Bricks
For a more permanent edge, consider using concrete or mortar to secure the bricks. Apply a thin layer of mortar to the sides of the bricks as you place them. This will help keep the bricks in place and prevent shifting over time.
6. Backfill the Trench
Once all the bricks are in place, backfill the trench with soil, packing it firmly against the bricks to hold them in place. Water the soil lightly to help it settle.
7. Final Touches
Inspect the brick edging to ensure all bricks are secure and level. Make any necessary adjustments. Clean off any dirt or debris from the bricks to give your garden edge a polished look.
Creative Brick Edging Designs
Brick edging offers endless design possibilities. Here are a few creative ideas to inspire your garden border:
1. Herringbone Pattern
For a distinctive look, arrange the bricks in a herringbone pattern. This design adds visual interest and works well for both straight and curved edges.
2. Soldier Course
A soldier course involves standing the bricks upright, side by side. This creates a bold, clean line that defines the garden boundary clearly.
3. Basket Weave
In the basket weave pattern, bricks are laid in pairs at right angles to each other. This intricate design adds texture and charm to your garden edging.
4. Running Bond
The running bond pattern is a classic arrangement where bricks are laid end-to-end in a staggered formation. This simple yet elegant design suits any garden style.
Maintaining Your Brick Edging
Brick edging is low maintenance, but occasional care will keep it looking its best:
- Weed Control: Check for weeds growing between the bricks and remove them promptly. Applying a pre-emergent herbicide can help prevent weed growth.
- Cleaning: Periodically clean the bricks with a mild detergent and water to remove dirt and moss. Avoid using harsh chemicals that can damage the bricks.
- Inspection: Regularly inspect the edging for any loose or shifted bricks. Adjust them as needed to maintain a stable edge.
Conclusion
Edging your garden with bricks is a rewarding project that enhances the beauty and functionality of your landscape. With careful planning and execution, you can create a durable and attractive border that will last for years. Follow our comprehensive guide to achieve professional results and enjoy the timeless charm of brick garden edging.


Find Us on Socials